"Fall" work in progress, Part 4


This painting is taking forever. I only have nights and weekends to work on this, so progress is very, very slooooowwww...... so many little details yet to paint, two weeks left to go before I need to scan and make prints for APE.

The birds are cedar waxings, which have a field day in the fall pulling berries off of branches. My next step is to finish all the birds, add blowing leaves, branches and berries, and finish up the background, which I would like to be simply stated and soft. My process is pretty straight forward: block in the big shapes in a thinner mix of oil paint, breaking down light areas and dark areas first. After the basic shapes of light and dark were applied, I built up thicker areas on top, with more value transitions in between. For thicker areas of paint, I use less thinner and more medium, which is 5 parts rectified turpentine, 1 part linseed oil, and 1 part dammar varnish. I like this medium because it allows the oil paint to get a really nice sheen to it as it dries, which is the look I'm going for in this one.
I realize the entire painting looks very orange. It is intentional. Since this is a series of four paintings, each painting will have a dominant color. I felt the Fall painting would be predominantly oranges, yellows, burnt siennas and reds. The birds are a bit more gray, so once they are put in I will add some more gray tones to balance out the color throughout the painting.

"Fall" Work In Progess, part 2

I decided after transferring the drawing to a large board that I needed some more elements like birds and blowing leaves. So on a separate piece of tracing paper I drew out some leaves and birds, then transferred them to the drawing using Saral Wax Free transfer paper.
Btw, I highly recommend Saral brand Wax Free transfer paper. I've been using it for years - I discovered it back when I painted background environments for Lucky Charms and Trix cereal commercials. I needed a way to transfer the layout drawings very accurately on to a board before I began painting. I initially used regular transfer paper but quickly learned that the waxy surface of the transferred lines resist paint.

After I finished the transfer and was happy with the drawing, I moved on to a value sketch and a color sketch. The light pattern in this painting is important in portraying a sense of mood and time of year in this series, so I felt it necessary to fully work out a value sketch before jumping into the final. The planes here are simple: Foreground, Midground, and Background (sky), which are painted in three separate layers on top of my line drawing in Photoshop.After I spent some time experimenting with shadow patterns and values, I messed around with a color scheme, which I painted in new layers on top of the value sketch. I decided on mixtures of three hues: yellow, orange and lavender. I also kept the color very saturated in the foreground to reflect a certain emotional tone I am aiming for in this series.
This is a rough color sketch, so i omitted any details, wanting to concentrate only on the color scheme and figuring out my palette. To go any further would not serve me well because I would burn out on the idea and not feel as excited about finishing the final.

Next, I'll begin on the final painting. I will post the next steps as soon as I can!

"Fall" work in progress

I am working on a series of four paintings, emblems of the Seasons, as I envision them. I sketched out all four earlier this year and finally have the time to resume completing the series. These paintings are entirely from imagination, a skill I have always admired in others, and lately have explored more fully myself (and not for portfolio pieces aimed at gaining a job). I really enjoy aspects of designing a picture that I cannot get from posing a model and painting him or her from life. In addition to that, I have this desire to attempt to make beautiful pictures that are pretty, simple, sometimes fantasy, playful in proportion and design, interpretive, and entirely my own.

In addition to this series, I am also working on a series of Elements paintings. I also have planned two small self published books, which I've designed but need to illustrate. I have no idea how long it will take, given that I have a full time job - but I'll just work, work, work until they are done.

Here is the beginning of "Fall": I coated a piece of cold press illustration board with three thin coats of acrylic gesso, let dry, and am now in the process of transferring the drawing (enlarged from my sketch) on to the board via Saral wax free transfer paper. Since the sketch is so small, I am also drawing out details on top of the transfer, making my drawing exactly as I want it. I've added an expression to the drawing as well, which was not present in the original sketch. Next step will be a small color sketch before painting the larger piece seen here. Stay tuned! (may take about a week)


something a little different


I made this at a class last year. The class, described as "Mother Winter" came accompanied with a photo of a wooden artists manikin and a glass dome attached underneath with a brief description stating something about making 'Mother Winter' - I was intrigued. The class was created by Ulla Milbrath, who instructed us one Saturday afternoon at Castle in the Air in Berkeley, CA. Quite possibly the first store I've ever regarded as a miracle.

Here you can find my figure and a few of the other students interpretations


We spent all day in the second floor workshop of Castle in the Air, all women, contriving our interpretation of the phrase "Mother Winter", crafting with bits and pieces from Ulla's vast closet of paper, clippings, fabrics. We learned new techniques with fabric stiffener, starching and paper molding. Ulla provided sculpted faces that she pressed from a mold she made in preparation of this class. We each painted our own, and applied them to our figures. Each student's Mother Winter figure was distinct; we each had our own projection of this layered archetype.

At the time I made this, I was thinking a lot about an idea I kept sketching, botanicals used as adornment on a face or head, but also to describe a feeling:

The idea is certainly nothing new, many artists have used the theme of objects in the hair, morphing gracefully into something else. In fact, the idea goes back quite far. Check out the book Natural Fashion: Tribal Decoration from Africa:
Beautiful, inspiring, primal. Decoration, adornment, survival, expression, self...


There is something about crafting with women. Why do I find this activity so calming? Maybe it is a distant memory whispering in my ear about our hunter gatherer days, days when we made baskets and pottery or sewed clothing by hand for our families and ourselves, when our 'crafts' meant a means to survival and we did it together. But that seems too distant. More likely, crafting reminds me of something much more intimate: drawing on the floor whilst my mother endlessly sewed, knitted, paper mache'd, painted, molded, quilled, folded, embroidered, quilted creations for holidays, sheer whimsy, and quite possibly her sanity while we moved about the country in a lonely existence, as all military families do. And to think my mother did this growing up and then into marriage and motherhood. Crafting has a purpose. Looking at the cross stitch embroidered pillows and dolls my mother made as a child in the military, I can see this activity has a purpose far beyond frivolous decoration.
How else do we deal with the roller coaster of life, but create? And when we create together we enjoy some sort of primal connection. We have something to make, to talk about, to play with, to have fun with that has nothing to do with anything but exploration of our own creativity. We all enter with our minds engrossed in our daily lives and by the end of the day escape into the art of 'make', giving birth to something new and whole, something tangible that draws from bits and pieces of imagery and textures that our senses regard as important, creating a symphony of Who We Are.
It is the grand culmination of sharing, exploring, thinking, and expression. Although this habit of crafting is is not directly or obviously related to painting, my job, sketching, or the like, making frivolous, decorative things, sometimes it just feels good. It just does.

ICON6 promotional postcard design


I have to have something like a business card or postcard give away for the upcoming ICON6 illustration conference. So I made up these post card sized cards, which is really a preliminary cover for a self published book I am working on in between projects. I think I want to adjust the decorative flowers on the top and bottom, and hand draw a title, which tentatively is being called "Daisy".
If you are at the ICON6 show, please stop by and say hello!

UPDATE: not sure if I would exhibit at this show again. It was promised that over 6,000 art directors would be there, but from what I could tell less than 200 showed up! Some had said it was because the show was in Los Angeles. Most art directors for print illustration are based in New York. I had heard from exhibitors that in the past when the show is on the East Coast, more art directors attend. If you are planning to try this show out as an exhibitor, be aware that this was my experience. If the show is on the east coast, I might consider it again.

LIfe Drawing at Sadie's Atelier


On Tuesday evenings I go over to Sadie Valerie's Atelier for an open studio life drawing workshop. We extend the pose for four Tuesdays, ensuring that all of us can get the level of finish that we like, thoughtfully observing and indicating anatomy as best we can. I have been experimenting with Pitt brand pastel pencils on charcoal paper and having fun with it, although I do feel the redness of the tone might be a bit much. (and for some reason hard for my camera to photograph)
Lately I have been engrossed in human anatomy while resting between illustration projects . After I finish up my various projects for the fall (hopefully four to five prints, the Sephalina pin up, and some additional pieces, revised website, blog header, and etsy shop...), I plan to fully immerse myself in a rather intense ecorche class taught by Andrew Ameral, who taught at the prestigious Florence Academy (a school I would LOVE to attend...). I want to, once and for all, KNOW what it is I am drawing, rather than just putting down shadow patterns. Shadow patterns are fine and all in drawing, but it's also very helpful to know the structure underneath in order to make a believable picture. Not to mention that knowledge of anatomy for sculpture is extremely useful, as well as drawing from memory and imagination. Solidifying knowledge of human anatomy, I expect, will go a long way, whether I am painting realist or imaginary subjects.

Hopefully by this time next week, I will be posting the finished PIN UP I'm working on at night and weekends for Jamie's new book, Sephalina. I've been taking photos along the way, so maybe I'll include a few work in progress shots to show the haphazard and chaotic way I approach an illustration, tears and all. :)

Submission to ICON6 Illustration Road Show


This is the piece I am submitting for the ICON6 Illustration Road Show slide show. I will also have a table and promotional materials at the show in Pasadena, CA, on July 15.

Daisy Girl was totally reworked from an old sketch and more fully realized. I had fun working on this. I should say, I had fun after I figured out a technique. For many years now, I have greatly admired the work of turn of the century illustrator Jessie Wilcox Smith and also Cicely Mary Barker. I have tried many times to mimick their techniques unsuccessfully. I finally came up with something (totally by accident!) that seems to come the closest to the aspects of their work I like the best: loose lines, some modeling in the shadows, some texture in the shadows.. imperfection yet still accurate drawing, some invention, imagination. I'm not saying this piece is all of *that*, but I do feel the spirit of the painting is in the ball park. Feels nice to research something for a long time and finally arrive in that ball park!

Technique Experiment

Today I have been experimenting with painting technique tests for the finish on the Sephilina pin up for Jamie's book.

I want to use the watercolor techniques I've often used in the past, but also preserve the line work. After several unsatisfying experiments, I decided to use gouache with smoothly modeled soft finish rather than a loose watercolor style.

The first thing I did here was draw out a little sample with tuscan red pencil, fleshing out the shadow pattern (which I took liberties with) and added some lines. Next, I applied Golden Acrylic Fluid Matte Medium in a thin layer.


After that, I painted in the local color of the face and hair, very thinly, in gouache, and then began building up layers in the shadows, preserving the white of the illustration board as much as possible. I did find I needed to glaze a little white gouache over some areas and used it for a soft highlight here and there.
After all of that, I used my all time favorite pencil, a brown Stabilo Aquarelle pencil, to add a few lines on top of the color.


what I'm working on lately


I have a sculpture in the works that is my very first interpretive project. By interpretive, I mean, the model posed for about three sessions, enough for me to get down his attitude and form, leaving me with enough information to listen and visualize the rhythms of the pose, connect with my instincts, my soul, and conjure up something all mine. What will I do with that block of clay his leg is resting on? What is the moment he is living in? What am I choosing to express here?

I'm thinking about these artistic choices throughout my days while at work, hoping I can do justice to this model's absolutely magnificent body, somewhere between masculine and feminine grace. In all my time of working with models, I have only found a few that inspire me to a degree that seems otherworldly. Their work somehow makes a lightning jolt connection to my visual synapses igniting instant images that seem to flow in front of my eyes like postcards or snapshots...they are there, right there. The question is, have my skills progressed enough in order to express what I see and feel? What direction should I take this, I ask myself...should he be fantasy or sheer realism?

I have a feeling my dreams will tell me. Or a few glasses of wine and some music, or perhaps a few life drawing sessions @ Lenny's group or Sadie's, or more likely, my sketchbook and warm bed.

I am also working on my blog. I have not been happy with the layout on this blog, so I'm planning to go totally custom. I have a header and footer as well as side pieces in the sketch phase, which I plan to post very soon as a work in progress.

When I was in art school, no one ever told me that at some point you enter into a phase where wondering what to say becomes all encompassing. Making a statement is harder than I thought. When I was 19 and in art school it seemed so easy. twenty years later making a statement, a true unabashed statement of who I am/was, is harder. Maybe it's the idea that now it 'counts'. Now I have to be real. My ideas these days about art are more complex as I gain a personal history, as we all undoubtedly do. My influences have expanded beyond what they originally were, due mainly to the community of artists I am surrounded by. I am in a state of perpetual evolution; no longer am I only a realist alla prima painter. I am something in addition to that.


thumbnails for Seasons

So about a week ago I messed around with a cool online drawing tool and came up with some loose thumbnails for a set of illustrations that I have been thinking about for some time now, inspired by Alphonse Mucha drawings.

Here are the more developed thumbnails from the original loose first drafts. I plan to take these to a larger size, figure out the details and then paint them in watercolor. (I think...)
One of the goals in the next step is to make sure the four seasons look like the same person. I also feel the faces and bodies are slightly too on the cartoon side; I would prefer them to look more realistic, even though these are clearly fantasy. The other goal I have is to flesh out the details in the branches and flowers, and also tighten up the borders so they are all about the same size and loosely rectangular in shape. I'll post the next steps when I finish them...if I ever have the time between work and errands and chaos!


I also might consider covering the bodies in tattoos. My intent, with perhaps the exception of "Summer" is NOT to express sexiness, rather express something more impish and spirit like. I might mess around some more and see if I can come up with alternative versions of these thumbnails, after seeing them up there on the big computer screen.

Venitian Glass Blowing

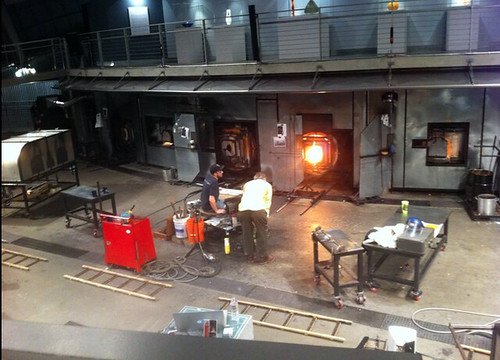
I recently visited my Dad and step mom Susan up in Washington. I was there because my boyfriend Jamie Baker and friends Derek Thompson, Ted Mathot, and Jeff Pidgeon had booths at the Emerald Con Comic Book Convention. It was a successful show for the guys. The last day of the convention, I snuck off to the Tacoma Glass Blowing Museum with my Dad and Susan for one day, and wow was it cool! Actually, a more accurate term would be HOT.

The museum houses a glass blowing studio, a "hot box", where interns and experienced glass blowers who were trained at the Pilchuck School, can go to practice their craft, a school Dale Chihuly helped found in 1971. If you aren't familiar with Dale Chihuly, you might have seen his work on the ceiling of the Bellagio in Las Vegas.

We watched a fascinating demonstration on the centuries old Venetian glass blowing technique, perfected in Venice during the Renaissance. Amazing!


Screen shot 2011-03-15 at 11.37.11 PM

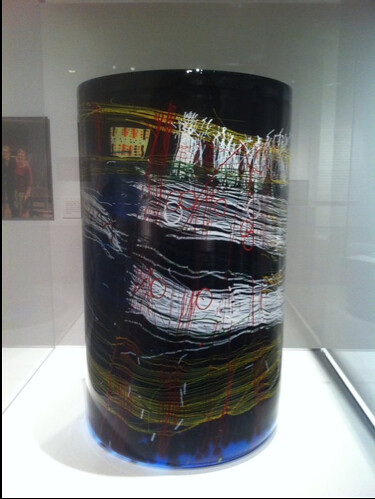
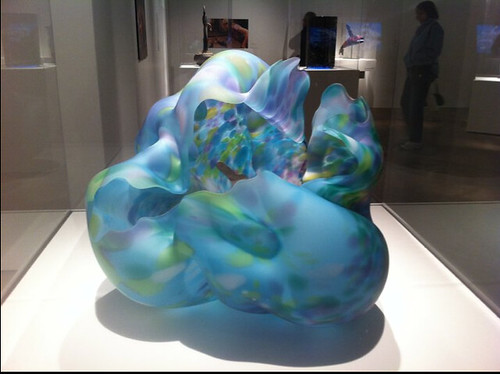
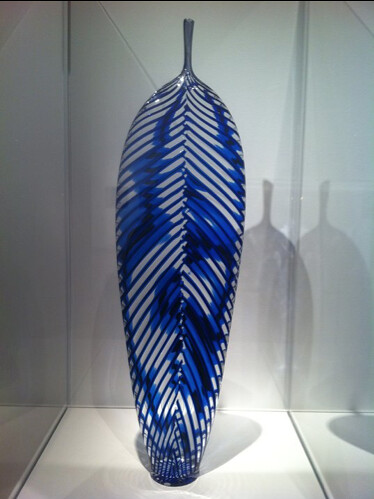
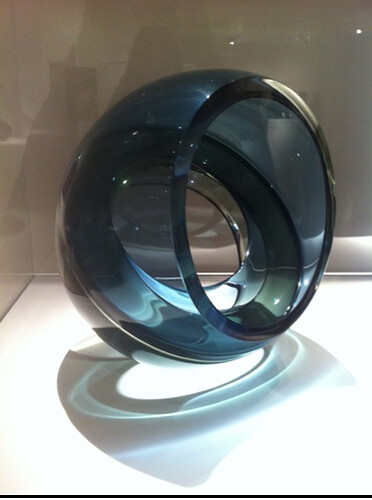
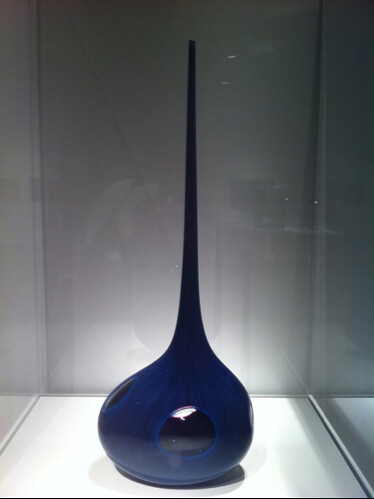
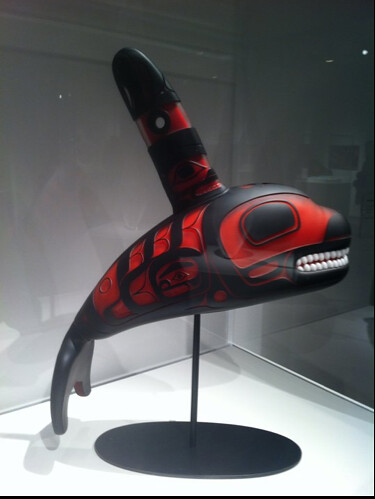
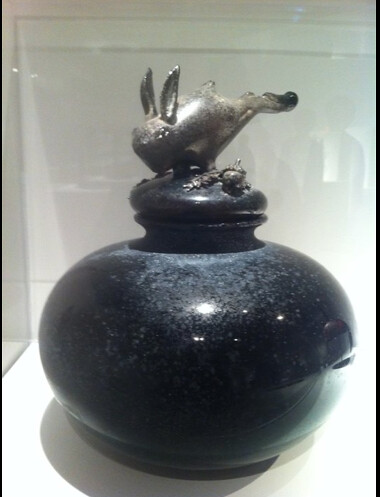
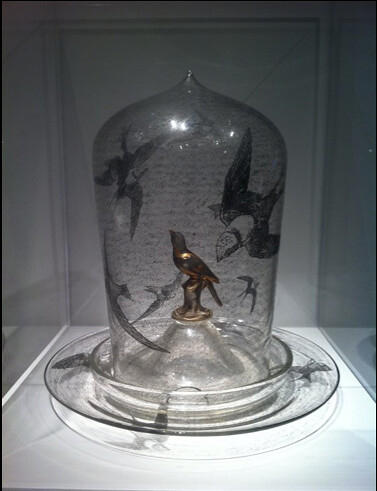
The museum also hold several pieces from internationally recognized glass artists. I did not write down the names of the artists, unfortunately. Regardless, the beauty they channel is stronger than words:

Screen shot 2011-03-15 at 11.36.56 PM
Screen shot 2011-03-15 at 11.36.44 PM
Screen shot 2011-03-15 at 11.36.30 PM
Screen shot 2011-03-15 at 11.36.17 PM
Screen shot 2011-03-15 at 11.36.03 PM
Screen shot 2011-03-15 at 11.35.50 PM
Screen shot 2011-03-15 at 11.35.32 PM
Screen shot 2011-03-15 at 11.35.17 PM
Screen shot 2011-03-15 at 11.35.04 PM
Screen shot 2011-03-15 at 11.34.40 PM

I know it is cool to talk about avant guard art from the 20th century as totally bunk. However, when I look at many of these pieces, I see nothing that adheres to the classical realist tradition that I so love. And yet, these pieces are undeniably beautiful.

Thumbnails on the Web

I am working on a series of watercolor illustrations of the four seasons, inspired by the enduring works of Alphonse Mucha. A friend on Facebook posted this great online tool, so I thought I'd give it a try. I love the results!
Here is the web link to Harmony, a procedural drawing tool web page. Just select at the top which brush you'd like to use and then start drawing in the white area.

http://mrdoob.com/lab/javascript/harmony/#shaded


SPRING

SUMMER

FALL

WINTER


and a Redo of my pink daisy girl sketch

Andrew Cawrse Anatomy Workshop

I just finished a week long intensive anatomy sculpting course, Andrew Cawrse's level 3 anatomy workshop, Dynamic Anatomy. Because the classes are relatively new, I thought I might report about the class in case anyone out there is interested in learning about dynamic anatomy, whether the knowledge is applied digitally or traditionally.

On the first day we set up the model, Cason, in a kneeling pose. We quickly gestured in his form on a small armature as best we could. After a few hours of this, Andrew asked us to take our gestures off the sculpting stands and set them aside for later use at the end of the week. I thought this was a great idea and feel very happy to have gone through the exercise, although in entering the class I was not aware that we needed at this point to purchase a second, bigger armature and would have liked to know that before hand so as to be mentally prepared for the additional cost. I personally was not too miffed about this aspect since I sculpt on a weekly basis and can always use more armatures. However, I can see how others might have been a little surprised if they were new to the sculpting world. So, if you are to take Dynamic Anatomy, just know that you will need to purchase TWO armatures and probably all of the specialized tools, which end up being about $500 extra, a pretty significant cost added on to the $1500 base fee. HOWEVER, I want to emphasize here - TOTALLY worth it. (Maybe it was mentioned in the description of the class and I missed it.)

Anyway, after the first exercise, the model was posed in a standing position with a leg up on a box to show bending of the knee, a twist in the rib cage and the opposite arm up high, to demonstrate motion in the arm, rib cage and hips. We then spent the afternoon and the morning of the second day sculpting out and measuring the general proportions of the figure as best we could, which is MUCH faster than what I am used to! However, this was necessary since there was so much ground to cover in anatomy lessons. On the afternoon of the second day we began the good stuff: carving out muscle groups and indicating them on the body, specifically the legs. You can see here I didn't finish.


After we tackled the boney landmarks and muscle groups of the legs, we spent a pretty significant amount of time on the third day learning about the scapulae. Andrew and his assistant, Eric -who also assists mega alpha sculptor Richard MacDonald and is an awesome sculptor in his own right- both expressed that knowing the scapula bones are extremely important in understanding how the figure works. The reason being that the bone, although attached to the clavicle, moves and shifts as the arms and rib cage move. In addition to that, a lot of complicated muscles of the back attach to these bones, causing further confusion. However, if you become intimately familiar with the shape and function of the scapulae, the rest becomes easier to understand, and helps in making a figure look far more believable. Great lesson!

We proceeded by measuring the boney points on the model with our calipers, and sculpted out the exact shape of both scaplua as best we could. This was no easy task since both were in different positions on each side!


After about an hour or so of this, with Andrew's approval, we then laid clay on top of the scapulae and drew out the musculature of the back. Unfortunately I didn't take a photo of my drawn out muscles. Here is the initial stage, though.

During this portion of the class, I found it very helpful to refer to one of Andrew's reference figures, which he sculpted and sells on his site, www.freedomofteach.com. He also had a skeleton in the class for reference that had painted landmarks indicated in red and blue to show various points of origin and insertion of muscles on the skeletal figure. Very useful!


After the back, we moved on to the hands and feet (or perhaps we did those before the back?) We learned some simple measuring tips and technique for sculpting the hands and feet, which were incredibly useful. We only spent about an hour on each, so what you see here is the best I could do while rushing to get the planes and all the anatomy in before moving on to the next subject.


Next subject was the rib cage and muscles of the torso. PIECE OF CAKE compared to the back.
The first step was to locate the top, bottom and width of the rib cage using the calipers to measure the model, Cason (who, btw, is a FANTASTIC model - awesome dancers body). Once we indicated these points on our sculpture, we then carved out the planes of the ribcage and drew in the ribs, sternum and clavicle. (pardon me if I'm spelling these wrong, btw)

Once the ribs came in, we then put in the serratus anterior muscles on top. We were very lucky to have a model that had extremely well developed serratus muscles, which he believes might have developed from being on a wrestling team. Makes sense, since these become flexed to stabilize the torso.

next came the external obliques, which attach to the serratus anterior muscles.

and after that, the pectoralis major muscles of the chest, which originate from the clavicle and rib cage and tuck in underneath the deltoids.


Here is my finished, well, half way finished, rib cage with the muscles. Behind my sculpture you can see assistant Eric's sculpture. Having Eric there was extremely beneficial to the class; we all referred to his gorgeous sculpture often to check against for errors in our own.

Next up was some time with the anatomy of the skull and neck muscles. This took place on the morning of the last day, Friday. Andrew went through the key boney points and planes of the skull. We laid in the planes and carved out the skull. Unfortunately I ran out of time and wasn't able to completely finish. Also, I took photos with my iphone. I've noticed there is a slight distortion...I swear! (The head here looks a tad too big and slightly warped)


On Thursday evening, Andrew and his assistant Eric weighed the sculptures in order to calculate how much clay we used, which was then added to the invoice and billed accordingly. Mine weighed 20 pounds.

Finally the afternoon of the last day. We spent this block of time learning how to finesse the figure, add skin and refine the details. Andrew showed us a technique of adding bits and pieces of fat between the muscles and then brushing on turpenoid to melt the clay just slightly to create smooth skin. I worked on the leg and knee:


It's still a bit too defined, but you get the gist of it:

And here is my semi finished sculpture! Yay! The great thing about this is that I can continue to work on it at home referring to charts and books. I hope to get it to a more completed state so I can continue to have a better understanding of how the anatomy works on a dynamic figure. The only unresolved issue I have after the class is where to put it in my studio living room. I don't think Andrew can help me with furniture rearrangement. My sculpt has ended up sitting on my floor next to my art desk. It would be better to have him on a sculpting stand of my own so I can continue to work on him.

All in all, I highly recommend taking Andrew Cawrse's anatomy classes. I had also intended to take the next two classes, which sounded really amazing, too: Mike Murnane's creature anatomy class and Damon Bard's character sculpting class. I think regardless of what application you are eventually using these for, it would be worth the trip, the cost, the time and effort, given that you are studying with masters in the film industry whose knowledge is based in pure traditional art education, a tradition which still struggles to stay alive.

Having said that, since this is my personal blog, I should explain that my interest in sculpting lies in a love of the craft, the beauty of the human and animal form, and very deep passion for artistic exploration. While in the class, someone asked me (and everyone else) what I wanted to do with sculpting, to which I replied with heart felt sincerity, 'nothing in particular!' After a career in illustration for animation and games, as well as a failed attempt to get a fine art painting career off the ground, I have come to a choice in how I view being an artist. That is, if I attach an expectation to where I want to eventually go with a particular skill, i.e. a GOAL or specific JOB or gallery life, I will somehow stumble on career obstacles, create a lot of frustration for myself, call into question who I am, how 'good' or 'not good' I am, and subsequently dilute the passion of whatever it is that drives me to create for MYSELF.

These days, I intentionally continue to practice the things I love in my off hours from work, without any expectation of the eventual outcome at all. I can do this partially because I already AM a working artist with a pretty stable career. So what more do I need? My personal work is just that - personal, inspired, not at all attached to money or a living, and entirely from that pure stuff within the heart that loves to create. These days, the only personal mantra I keep is: develop my passion and the rest will take care of itself. I look forward to seeing what happens, and in the mean time I am happy. Kinda like the little pink flower girl illustration below. :)